Menu
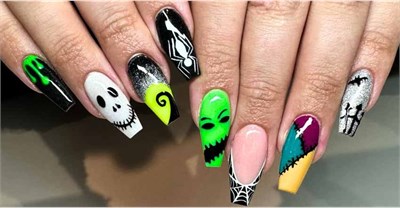
Get the look: Halloween nails
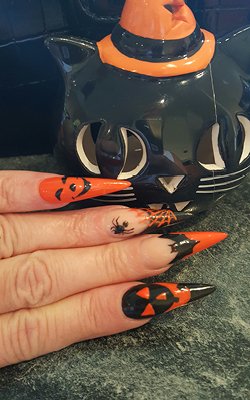
It’s not long to go now until Halloween and some themed nail art is the best way to embrace the event, from clients wanting some terrifying talons to go with their imaginative fancy dress outfits, to clients who just want to show their love for Halloween night without going all out. Here, nail artist Marianne, tells us how to achieve these brilliantly spooky nails…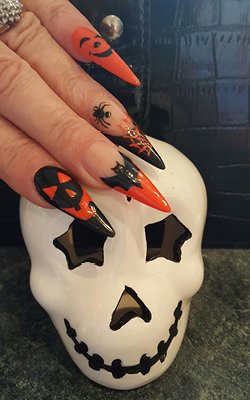
Step by step
- Sanitise the client’s hands and yours with Strictly Professional Sanitising Gel. Then, sanitise all tools and work surfaces - The Edge Sterilising Spray is perfect for this and is available in 60ml and 250ml sizes.
- Push the cuticles back and remove dead skin cells. Then, etch the natural nail with a 180 buffer.
- Cleanse and dehydrate, and apply primer.
- Fit the nail form to the desired shape – in this case, we have used The Edge Stiletto Nail Tips. Use cover pink in reverse application to the nail bed, and use clear acrylic to form the free edge.
- Remove the nail form and file with 180 grit (The Edge Duraboard Plus 100/180 File does the job). Once you’ve filed, buff to a smooth finish.
- Using gel polishes in orange and black, create your combination and cure for 2 minutes in a U.V lamp or 30 seconds in an LED lamp. In this case, we used Gellux 15ml – Black Onyx, Gellux 15ml – Feel the Vibe Hot In Rio, and used the Gellux LED Pro-Lamp.
- Use a fine detailer brush and the gels to create your patterns – spiders, bats, and pumpkins may be a bit cliché but they work really well with these colours – and cure for the required time.
- Apply gel top coat (we used Gellux 15ml – Clear Base/Top Coat) over entire design and cure.
If you create any Halloween nail designs of your own, share them with us on Facebook, Twitter, and Instagram – we’d love to see them!
Related Posts
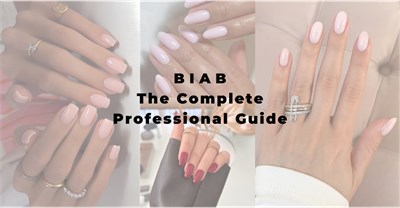
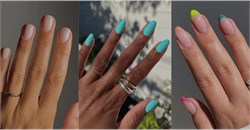
BIAB Nail Inspiration for Every Season: Spring, Summer, Autumn & Winter
In this guide, you’ll find timeless BIAB nail designs for spring, summer, autumn, and winter and the festive season, complete with pro tips to help you adapt colours, textures and finishes for any client, any season.

How to Stay Creative & Create BIAB Nail Designs Your Clients Will Love
In this guide, we’ll explore how to discover your creative potential with BIAB nail designs, from finding inspiration and experimenting with new techniques to keeping your designs on-trend.
A Nail Pro’s Guide to BIAB Nails: What Are They, Design Inspo & Removal
In this guide, we’ll cover everything from what BIAB gel nails are and how they compare to other systems to colour options and how long BIAB really lasts.
Week In My Shoes: A Day In The Life Of Shenique Dawkins
Ever wondered what a week in the life of a nail tech looks like? Join Shenique Dawkins, as she walks you through a typical week balancing content creation, client work, and raising young twins.
The Top 5 Nail Art Trends for Spring 2025
Spring is a time of new beginnings, and as always, that means some fresh nail trends! Whether your clients want a classic look or something bold, here are the top 5 nail art trends to watch this season.
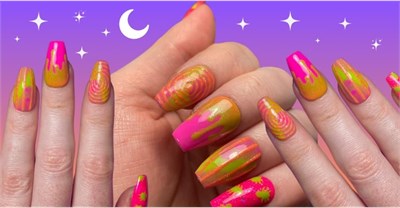
Spook-tacular Nail Designs for Halloween: Get Ready to Enchant Your Clients!
Attention all nail technicians and Halloween enthusiasts! As the leaves turn and the air gets crisp, we can feel the thrilling chill of autumn settling in. The most delightful (and spooky) season is just around the corner, and it’s time to get creative!

Nail the Magic: OPI X Wicked
Cast with spellbinding shades and glow-in-the-dark effects, it’s the most wicked-ly beautiful nail polish collection of the season.
Beetlejuice Nails
Need some Halloween nail inspo? Create a bold Beetlejuice vibe with this step by step guide from nail artist Emma @secondhand.nailart