Menu
Chinese New Year step by step using Gellux
To celebrate Chinese New Year, Salon System nail expert Louise has created a step by step using Gellux.Step One
First start by prepping the nails by pushing back the cuticle using the Salon System Cuticle Handy Manicure Tool, file to shape and gently buff the nail using the Salon System Turbo Buffer. Remove excess dust and wipe with GELLUX Prep & Wipe.
Using GELLUX Fast Bond, apply to the nails and let dry. Apply GELLUX Easy Off Base Coat, and cure.
Step Two
Apply a thin coat of GELLUX Devil Red to the ring, middle and index finger. Put a small drop of red onto a palette and drop of GELLUX Top Coat and mix. Apply this to the thumb and pinky finger and then, flash cure. Repeat, making sure to cap the edges.

Step Three
On the thumb nail using a fine detailing brush, draw a line down the middle and across the centre to create 4 squares. Then colour two opposite each other in GELLUX Poker Face and cure. Using GELLUX Purely White write Happy New Year in Chinese writing in each square on the thumb nail. Now go over this using GELLUX Adios Amigo and cure.
Step Four
Using GELLUX Black Onyx. On the middle finger sweep the brush from the bottom, right side of the nail to top, left side. Then, on the ring finger sweep the brush, still with GELLUX Black Onyx, from the bottom, left of the nail to the top, right of the nail. Then, flash cure.

Step Five
On the pinky nail use a fine detailing brush to create your flower design, using GELLUX Black Onyx on the pinky nail. Now, fully cure.

Step Six
Now using GELLUX Adios Amigo on the middle and ring finger. Use a small detail brush to draw a line halfway between the red and black. Then, on the middle finger swipe back and forward with a light layer of GELLUX Adios Amigo over the GELLUX Black Onyx previously painted and then, cure fully.

Step Seven
Now add the details to your flower, using a small dotting tool and GELLUX Purely White. Using the dotting tool, dot around the flower created and add in shadows using GELLUX Purely White to create dimension.

Step Eight
Finally, cure all the nails completely. Apply GELLUX Mirror Glaze Top Coat for high shine making sure to cap the edges and cure. Wipe over with the GELLUX Prep & Wipe and apply the GELLUX Nail & Cuticle Oil.
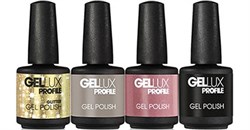
Discover all Gellux products from long-lasting gel polishes to top coats and accessories to recreate this look or create fresh, salon-quality designs for every season.
Related Posts

Three ultra bright Summer nail trends
Summer’s in full swing, so make sure you've got an array of styles to suit your clients’ holiday moods – especially if they’re not planning on leaving the country!
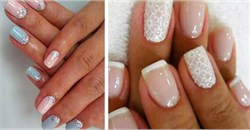
Offer your clients the perfect bridal manicure
After hair and make-up, nails can often be an afterthought for brides when it comes to their wedding day look but we think it polishes (pun intended) the look off.
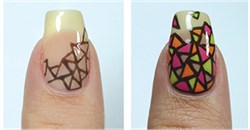
Stay on trend with this stained glass effect nail design
Lucy from www.lucysstash.com has created this negative spaces, stained glass effect nail design using NSI Polish Pro. This key trend involves leaving areas of the nail un-coloured to contrast with the bold and colourful nail designs on the rest of the nail.
Gellux nail technician, Julie-Anne Larivière shows us how to create these perfect leopard nails
Gellux nail technician Julie-Anne Larivière has been test driving the latest nail art techniques and has created this gorgeous, sparkly leopard nail design using Gellux gel polishes. It’s a great way to revamp your look and can play up even the simplest outfits.