Menu
Loving nails
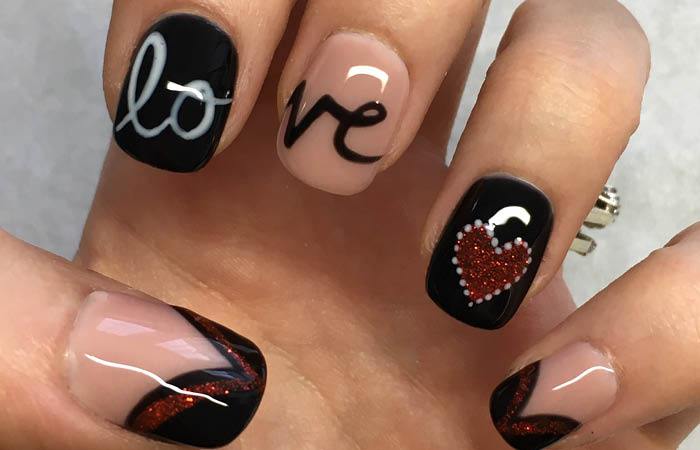
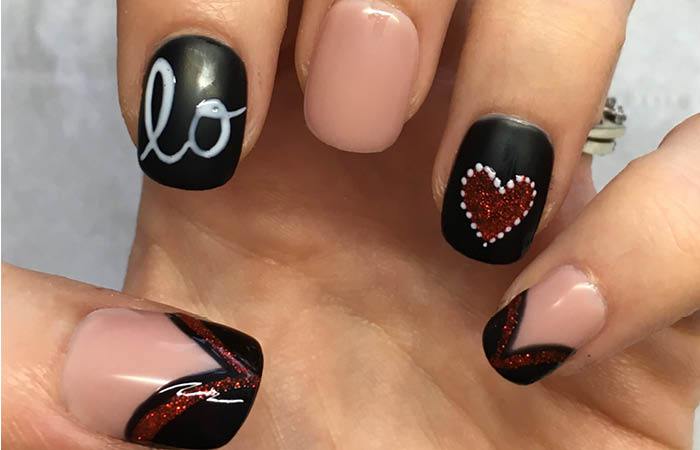
Here we share Salon System GELLUX Nail Technician, Julie-Anne Larivière’s gorgeous Valentine-inspired step-by-step using GELLUX.
Step 1:
Prepare nails and clean with GELLUX Prep + Wipe, and apply GELLUX Fast Bond. Allow to dry for 60 seconds.
Step 2:
Apply GELLUX Easy Off Base Coat, then cure; 30 seconds with LED, two minutes with UV.
Step 3:
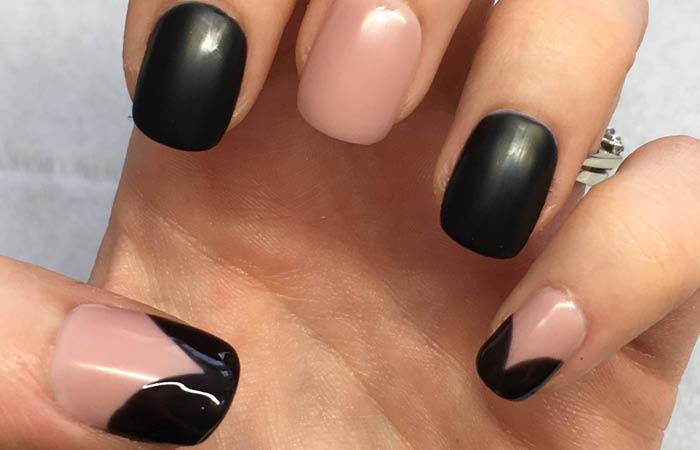
Apply two coats of GELLUX Bare Necessities on the thumb, middle and little fingers and cure; 30 seconds with LED, two minutes with UV, between each layer.
Step 4:
Apply two coats of GELLUX Black Onyx on the index and last remaining finger and cure; 30 seconds with LED, two minutes with UV, between each layer.
Step 5:
To create the reverse French manicure on the thumb and little finger, paint two overlapping semi-circles on each corner of the nail. When joined, the two semi-circles should look like a ‘V.’ Cure for 30 seconds with LED and two minutes with UV.
Step 6:
Using a short liner brush dipped in GELLUX Meteorite add the red lines on the thumb and little finger and paint a heart shape on the ring finger. Now cure for 30 seconds with LED and two with minutes UV

Step 7:
Using a short liner brush dipped in GELLUX Purely White paint the letters ‘L’ and ‘O’ onto the index finger and add small dots around the heart on the ring finger. Then cure for 30 seconds with LED and two minutes UV.
Step 8:
Using a short liner brush dipped in GELLUX Black Onyx paint the letters ‘V’ and ‘E’ onto the middle finger. Then cure; 30 seconds with LED and two minutes with UV.
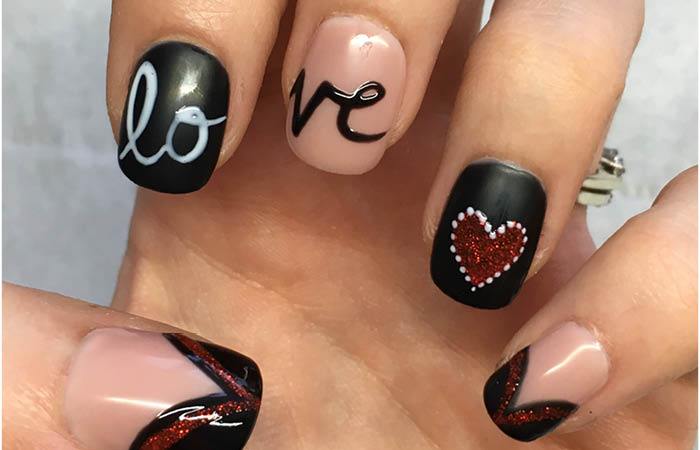
Step 9:
Apply GELLUX Top Coat, and cure for 60 seconds LED and three minutes UV.
Step 10:
Wipe off the sticky layer with GELLUX Prep & Wipe and apply NAILLUX Cuticle Cream to moisturise the skin around the nails.
Related Posts
BIAB Nail Inspiration for Every Season: Spring, Summer, Autumn & Winter
In this guide, you’ll find timeless BIAB nail designs for spring, summer, autumn, and winter and the festive season, complete with pro tips to help you adapt colours, textures and finishes for any client, any season.

How to Stay Creative & Create BIAB Nail Designs Your Clients Will Love
In this guide, we’ll explore how to discover your creative potential with BIAB nail designs, from finding inspiration and experimenting with new techniques to keeping your designs on-trend.

A Nail Pro’s Guide to BIAB Nails: What Are They, Design Inspo & Removal
In this guide, we’ll cover everything from what BIAB gel nails are and how they compare to other systems to colour options and how long BIAB really lasts.

Week In My Shoes: A Day In The Life Of Shenique Dawkins
Ever wondered what a week in the life of a nail tech looks like? Join Shenique Dawkins, as she walks you through a typical week balancing content creation, client work, and raising young twins.
The Top 5 Nail Art Trends for Spring 2025
Spring is a time of new beginnings, and as always, that means some fresh nail trends! Whether your clients want a classic look or something bold, here are the top 5 nail art trends to watch this season.
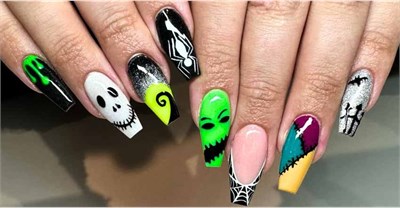
Spook-tacular Nail Designs for Halloween: Get Ready to Enchant Your Clients!
Attention all nail technicians and Halloween enthusiasts! As the leaves turn and the air gets crisp, we can feel the thrilling chill of autumn settling in. The most delightful (and spooky) season is just around the corner, and it’s time to get creative!
Beetlejuice Nails
Need some Halloween nail inspo? Create a bold Beetlejuice vibe with this step by step guide from nail artist Emma @secondhand.nailart

The Winter Nail Trends 2023
Hello 2023! The nails trends you need to follow this year are here...and we LOVE them! To find out what styles you should be rocking read more...